
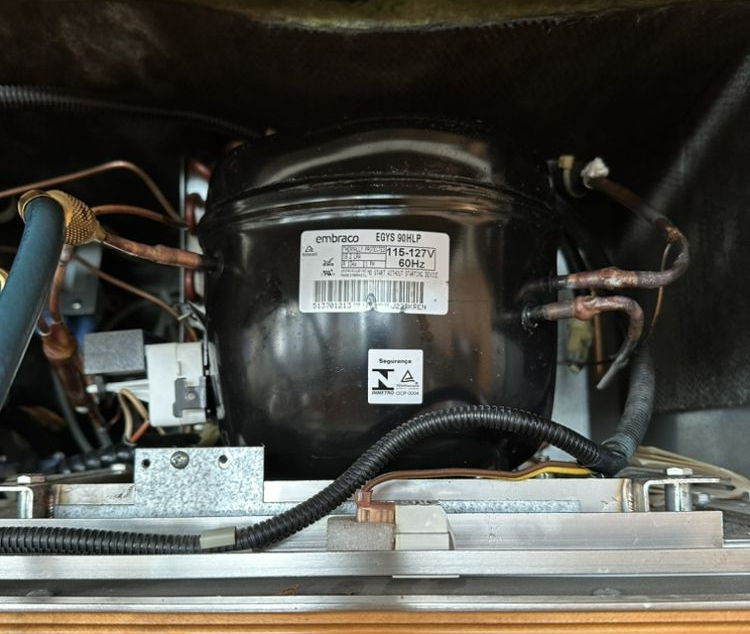
Quick Answer
The good news is that most “dead compressor” problems aren’t actually compressor failures at all. When homeowners call a repair technician because their refrigerator has stopped cooling, the culprit is often a failed start capacitor, a stuck overload protector, or a loose electrical connection—all of which you can fix yourself in under an hour for $15 to $50 in parts. The bad news is that some compressor problems genuinely require professional intervention, and attempting the wrong fix can damage your entire refrigeration system or violate environmental regulations.
Your path forward depends on a few key factors: how old your refrigerator is, what sounds the compressor is making (or not making), and whether your system has lost refrigerant. A compressor that’s 8+ years old and making grinding noises almost certainly needs replacement. One that’s clicking rapidly and cycling on and off every few minutes? That’s usually a $30 capacitor, not a $1,200 compressor. We’ll walk you through exactly how to tell the difference and what you can safely fix yourself versus when to call in a professional.
Should You Repair or Replace? The Decision Matrix
Before you invest time and money in a repair or call a technician, step back and honestly assess whether fixing your compressor makes financial and practical sense. Many people spend $500 to repair a 12-year-old refrigerator that would cost less to replace entirely—and the replacement would come with a warranty and better energy efficiency. Others attempt DIY repairs on sealed systems they shouldn’t touch, risking EPA fines and system-wide damage. This decision matrix will help you think through the key factors.
The simplest way to make this decision is to look at three things: your refrigerator’s age, what the compressor is actually doing wrong, and the estimated cost to fix it. A clicking compressor in a 5-year-old refrigerator that costs $30 to fix is an obvious repair. A grinding compressor in a 12-year-old unit that would cost $1,200 to replace? That’s when you start comparing it to the cost of a new budget refrigerator, which might be $600 to $1,000 depending on sales and your region.
| Consideration | Repair Makes Sense | Replacement Makes Sense |
|---|---|---|
| Compressor age | Under 7 years old | 10+ years old (sealed systems are expensive to rebuild) |
| Problem type | Won’t start, clicking on/off, weak cooling | Grinding, knocking, metal sounds (internal damage) |
| Estimated repair cost | Under 40% of replacement cost | Exceeds 60% of new refrigerator price |
| Refrigerator age | Under 10 years (parts available) | Over 12 years (fewer parts, less efficient) |
| System health | No other major failures | Refrigerant leaks, oil contamination, multiple problems |
| Warranty status | Not covered (DIY OK) | Under warranty (claim it; DIY voids coverage) |
The table above captures the key decision points, but your specific situation might push you one direction or the other. If you’re sitting at the edge—say, a 10-year-old refrigerator with a $600 repair versus a $800 new unit—the financial math increasingly favors replacement. You get energy savings that add up to $100-200 per year, a new warranty, and potentially better features. That initial investment difference disappears within a few years. Conversely, if your refrigerator is only 4 years old and the repair is genuinely $50, the decision is obvious: fix it and move on.
How to Diagnose Your Compressor Problem: A Step-by-Step Approach
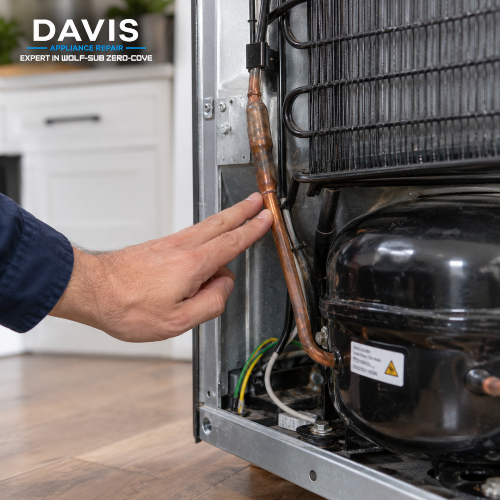
Step 1: Confirm the Compressor Is the Issue
The first mistake people make is assuming the compressor is broken when something completely different is wrong. Before you do anything, you need to verify that the compressor is actually the problem—not the thermostat, not a clogged condenser, not a loose door seal. This saves time and prevents you from replacing expensive parts unnecessarily.
Start by listening to your refrigerator’s normal operation. Place your hand on the back of the unit and feel for vibration. During normal cooling cycles, you should feel a clear vibration and hear a low humming sound about every 20 to 30 minutes. If your refrigerator is making no sound at all—no hum, no clicking, nothing—and you’re not getting cold air, unplug it and check the basics first. Is it actually plugged in? Is the power outlet working (test it with another device like a lamp)? These obvious checks catch about 5% of “broken compressor” calls.
Next, listen for what’s actually happening. If you hear rapid clicking that repeats every 2-5 minutes followed by silence, that’s the thermal overload protector doing its job—it’s cutting power to prevent the motor from burning out. This clicking pattern usually indicates the compressor is working but stressed, not that it’s dead. A truly dead compressor won’t click at all; it will either hum without producing any cold or be completely silent.
Now feel the suction line—the thin copper tubing that runs from the compressor toward the back of the refrigerator. It should feel cold to the touch. If it feels room temperature or warm, your refrigerant isn’t circulating properly, which could mean low refrigerant charge, a blockage, or a compressor that isn’t compressing. This is important diagnostic information.
Finally, check the obvious culprits that make people think their compressor is broken when it’s really something else. Is your thermostat set to the coldest setting instead of a normal level? Does your door seal (the rubber gasket) stay closed tightly when you close the fridge, or does it gap open? Can you see dust or pet hair caked on the condenser coils at the back of the unit? Any of these issues will make your compressor work harder than it should, causing it to overheat and shut down prematurely, which feels like a compressor failure but isn’t.
Step 2: Identify the Specific Problem
Once you’ve confirmed the compressor is the issue, pinpoint exactly what’s wrong. Different symptoms point to different causes, and some problems you can fix yourself while others demand professional help. The table below maps symptoms to their most likely causes and shows you which are DIY-accessible.
| What You’re Observing | What’s Most Likely Happening | Can You Fix It Yourself? |
|---|---|---|
| No sound, no hum, compressor won’t start | Dead start capacitor, failed relay, or burned wire | Yes ($15–40 parts, 20 min) |
| Rapid clicking every 2–5 minutes, then stops | Weak capacitor or overload protector stuck | Yes ($20–50 parts, 15 min) |
| Hum without actual compression, no cooling | Locked rotor, jammed expansion valve, severe refrigerant loss | No—sealed system failure |
| Runs normally but cooling is weak or absent | Low refrigerant, weak compressor, or blocked condenser | Depends—clean condenser first (free) |
| Grinding, knocking, or metal-on-metal sounds | Internal bearing failure, valve damage, or rotor seizure | No—mechanical failure requires replacement |
| Oil leaking around compressor housing | Gasket failure or cracked compressor body | No—replace only |
| Compressor housing extremely hot to touch | Refrigerant overcharge, poor heat dissipation, or restricted airflow | Maybe—start by cleaning condenser (DIY) |
Understanding this distinction is crucial. A compressor that won’t start is usually fixable by you in 20 minutes. A compressor that’s grinding is not fixable by anyone short of a replacement. The symptom is your road map—follow it to avoid wasting time or money on the wrong solution.
DIY Repair Options: What You Can Actually Fix
Repair #1: Replace the Start Capacitor (Most Common Fix)
The start capacitor is a small cylindrical device that provides the initial electrical burst your compressor needs to begin rotating. Think of it like a jumpstart for your car’s engine. When this capacitor fails, the motor can hum and try to turn over, but it never quite gets enough force to start rotating. You’ll hear the compressor attempt to start, fail, shut down, and then try again a few minutes later. This repeated clicking is frustrating to hear and stressful for the motor.
If your compressor is making this clicking pattern, there’s often a burning smell coming from the back of the refrigerator. That smell is the compressor motor’s winding insulation beginning to overheat from the constant failed start attempts. This is your signal that it’s time to replace the capacitor—not tomorrow, today. The longer you wait, the more likely the motor itself becomes permanently damaged.
The step-by-step process:
- Unplug the refrigerator completely. This is critical for safety. Even though capacitors are small, they store electrical charge that can deliver a painful shock. You need zero electrical current flowing before touching anything inside.
- Remove the access panel at the back of the unit. This is typically held by 2-3 screws (usually Phillips head). Slide it off to expose the compressor and its associated components.
- Locate the cylindrical capacitor. It looks like a small metal cylinder about 2-3 inches tall, usually sitting on top of or right next to the compressor. It will have wire terminals coming out of the top. This is your target.
- Discharge the capacitor before touching it. Use an insulated screwdriver to touch both terminals simultaneously. Yes, the fridge is unplugged, but capacitors hold their charge independently. When you touch both terminals, you’ll hear a small pop or spark—that’s the capacitor discharging safely. Now it’s safe to handle.
- Disconnect the wire terminals from the old capacitor and note their positions. Look at how the wires connect—typically there’s a terminal labeled “C” (common), “H” or “Run” (run winding), and “S” or “Start” (start winding). Take a photo with your phone if it helps you remember. Gently pull each terminal off. These are push-fit connections, so they slide off without tools.
- Remove the mounting clip and slide out the old capacitor. The clip (a metal or plastic holder) keeps the capacitor secured. Unscrew or unclip it, then carefully pull the old capacitor out.
- Install the new capacitor into the mounting clip. Slide it in the same orientation as the old one came out. Make sure it’s seated firmly in the clip so it won’t rattle around during operation.
- Reconnect the wire terminals to the new capacitor in the same positions. This is critical—wrong terminal placement means the compressor won’t start or could damage the motor. Match the terminals exactly as they were before. Push each terminal firmly onto its corresponding terminal on the new capacitor until you feel a solid click.
- Replace the access panel and plug the refrigerator back in. Double-check that you’ve connected all wires before powering it back on.
- Listen for the compressor to start within 30 seconds. You should hear a loud click followed by a hum as the compressor begins its normal cooling cycle. If you hear clicking with no hum, the start capacitor may not have been the problem, or the new one might be defective. If you hear nothing, double-check your wire connections.
Cost breakdown: A replacement start capacitor costs $20–$50, depending on the brand and specifications. Professional service for the same repair typically costs $150–$300 in labor alone. By doing it yourself, you pocket that savings and have the satisfaction of fixing your own appliance.
Repair #2: Reset or Replace the Overload Protector
The overload protector is your compressor’s personal bodyguard. Its entire job is to monitor temperature and cut power if the motor gets too hot. This prevents catastrophic failure—a compressor running without this protection and overheating will burn out its winding insulation and die permanently. When an overload protector malfunctions, it either doesn’t cut power when it should (allowing overheating), or it gets stuck in the “off” position, preventing the compressor from running at all.
The symptom is distinctive: you’ll hear one loud click as the compressor tries to start, followed by immediate silence. Nothing happens for 2-5 minutes, then you hear the same pattern again—click, silence, repeat. This is the compressor attempting to start, the overload protector sensing heat (or a stuck thermal element), and cutting power again. After a few cycles, it might stay off for an hour because the thermal sensor has cooled down, giving a false sense that it fixed itself. It hasn’t. The next day or next week, it will start clicking again.
The reset and replacement process:
- Unplug the refrigerator. Safety first, as always.
- Remove the back access panel. This exposes the compressor and the components attached to it.
- Locate the overload protector. It’s a small cylindrical device, usually about 1.5 inches long, mounted directly on top of or to the side of the compressor. It’s smaller than the start capacitor and has one visible button on the top—the reset button.
- Try pressing the reset button manually. Use a clean screwdriver or your finger to gently push it. You should feel or hear a soft click. If the compressor hums to life immediately after, the overload protector was temporarily tripped by heat but isn’t actually broken. This happens when a condenser is clogged with dust, forcing the compressor to work harder and heat up. Monitor your refrigerator’s cooling repair for the next hour. If cooling restores and stays stable, your fix is just to clean the condenser coils (we’ll cover that later). If it clicks and stops again within an hour, the protector is faulty and needs replacement.
- If reset doesn’t work, order a replacement protector. Search for “[your refrigerator model] overload protector” on an appliance parts website. Make sure you’re ordering an exact match for your model—these aren’t universal.
- Disconnect the terminal wires from the old protector. Note which wires connect where. Usually there are two or three push-fit terminals; photograph them before disconnecting if you’re unsure.
- Unscrew the mounting bracket. The protector is held in place by a metal clip or bracket. Unscrew it (usually one screw) and carefully slide the old protector out.
- Install the new protector. Slide the new one into the mounting bracket, install the screw to secure it, and then reconnect the terminal wires in the exact same positions they were before.
- Plug the refrigerator back in and listen. You should hear the compressor start within 30 seconds. If it does, monitor cooling for the next few hours to ensure stable operation.
Cost and timeline: A replacement overload protector costs $15–$40 and takes 15–20 minutes to install. Professional service for this repair runs $100–$200. If you’re replacing it yourself, you’re saving $75–$160 in labor.
Repair #3: Check and Tighten Electrical Connections
Electrical connections corrode or loosen over time, especially in humid kitchens or older refrigerators. When this happens, power doesn’t flow reliably to the compressor motor. The compressor might work one day and not the next, depending on whether the loose connection is making good contact. You might also hear buzzing or arcing sounds—indicators that electricity is jumping across a gap rather than flowing smoothly through a connection.
- Unplug the refrigerator.
- Remove the back access panel.
- Visually inspect all wire terminals connected to the compressor—look for white, blue, or green oxidation (corrosion) or wires that move loosely.
- If corroded, gently clean the terminal with a small wire brush or fine sandpaper.
- Tighten each terminal connection with a screwdriver. Feel for resistance; don’t over-tighten.
- Plug in and test. If the compressor starts and cooling resumes, you’ve solved the problem.
Cost: Free (unless you need replacement wire, which costs $5–$30 but requires professional installation if you’re unsure).
Repair #4: Clear Airflow Blockages Around the Condenser
Your refrigerator compressor gets hot when it runs. The condenser coils—those thin metal tubes on the back or underneath your refrigerator—are responsible for releasing that heat into the kitchen air. When these coils clog with dust, pet hair, and lint, heat can’t escape efficiently. The compressor overheats, triggers the overload protector, and shuts down. It cools off in a few minutes, tries again, overheats again, and the cycle repeats. You end up with weak cooling despite a compressor that seems to be running constantly.
This is one of the most common compressor “failures” that isn’t actually a failure at all. A simple cleaning fixes it completely. The good news is that this repair costs nothing and takes 30 minutes. You probably have all the tools already in your home.
Start by unplugging the refrigerator and pulling it away from the wall so you can see the condenser coils. On some models, the coils are visible at the back of the unit; on others, they run underneath. Look for thin metal tubing that might be caked with dust. If you see visible dust buildup, that’s your problem. Use a soft-bristled brush, an old toothbrush, or a vacuum with a brush attachment to gently remove the dust. Don’t scrub aggressively—these fins are fragile and bend easily. Just brush gently in the direction the fins run (usually vertically).
Cost: Free if you use a soft brush and vacuum you already own; $10–$20 if you want to buy a fin comb for easier cleaning.
When Professional Help Is Essential (Not Optional)
There’s a clear line between “I can fix this in my garage” and “I need a professional.” Crossing that line puts you at risk of EPA fines, electrical injury, or destroying your entire refrigeration system. Here’s exactly where that line is and why it matters.
Sealed System Work Requires EPA Certification
If you need to open your refrigeration system—to replace the compressor, fix a leak, or work on refrigerant lines—you must have an EPA Section 608 certification. This isn’t optional. It’s federal law because refrigerants contain chemicals that damage the ozone layer and contribute to climate change. Venting refrigerant into the atmosphere is illegal and carries fines up to $25,000 per violation. Recovering refrigerant requires specialized equipment (a recovery machine, vacuum pump, and gauges) that costs $2,000–$5,000 to own. Even if you wanted to do this yourself, you can’t legally, and you shouldn’t try to circumvent the law.
Removing or replacing a sealed compressor also requires skill you probably don’t have. Moisture contamination is your enemy. If even a tiny amount of moisture enters the system during a compressor replacement, it mixes with the refrigerant and oil, creating acids that destroy the new compressor’s motor winding. You’d replace a $1,200 compressor, run it for a month, and it fails again because you didn’t evacuate the system properly. That’s a costly lesson.
Mechanical Noises Mean Internal Failure
If your compressor is grinding, knocking, or making metal-on-metal sounds, stop using it immediately. These noises indicate internal bearing failure, a jammed valve, or a seized piston—all irreversible damage inside the sealed system. Continuing to run a compressor with mechanical failure will cause it to shed metal particles throughout your entire refrigeration system. Those particles get trapped in valves, clog the expansion device, and contaminate the oil. Even if you replace the compressor, the contaminated system will destroy the new one within weeks.
The repair path here is straightforward: replacement. The cost is the same whether you try to fix it and fail or replace it from the start. You might as well do it right the first time.
Refrigerant Leaks Demand Professional Detection
If your refrigerant has leaked significantly (more than 10–15% of the system’s charge), your compressor is probably starving for oil. Refrigerant carries oil circulation through the system. Without sufficient refrigerant, oil doesn’t circulate, the compressor runs dry, and the motor overheats and fails. Simply refilling with new refrigerant won’t solve this because you haven’t fixed the leak. A week after refilling, your system loses charge again, the compressor starves again, and you’re back where you started.
Electrical Work Carries Real Danger
Capacitors store electrical charge even when your refrigerator is unplugged. Touching both terminals of a charged capacitor without discharging it first will burn your skin. This isn’t theoretical—it’s a common injury in appliance repair. Miswired electrical connections can cause fires or electrocution. If you’re uncomfortable discharging capacitors and identifying wires, don’t attempt the work yourself. A professional technician knows how to do this safely. It’s worth the $150–$300 service fee to avoid a hospital visit.
What Professionals Bring to the Table
A professional technician arrives with tools and knowledge you don’t have access to. They have a manifold gauge set that measures system pressures, superheat, and subcooling—measurements that tell them exactly what’s happening inside a sealed system. They can run a capacitor test without opening the fridge. They can use a multimeter to check electrical continuity without risking electrocution. They understand EPA regulations and won’t put you in legal jeopardy. They also carry liability insurance, so if something goes wrong during the repair, you’re protected.
A service call for diagnosis typically costs $100–$300. That investment often clarifies whether your problem is a $30 fix or a $1,200 replacement. Many technicians credit the diagnosis fee toward the repair cost if you proceed with service, so it’s effectively free. Using a professional for sealed system work isn’t a luxury—it’s the only legal and safe option.
Repair vs. Replace: Cost Analysis
The financial decision should drive your repair or replacement choice. It’s tempting to focus only on the immediate cost, but you also need to think about longevity, energy efficiency, and the risk of another failure six months from now. Let me walk you through three real-world scenarios to show how the math actually works.
Scenario 1: Your 5-Year-Old Refrigerator Won’t Start (Dead Start Capacitor)
This is the easiest scenario. Your refrigerator is relatively new, and the diagnosis is clear—compressor clicks repeatedly, smell of burned insulation, typical capacitor failure symptoms. The repair is straightforward: replace a $30–$50 capacitor.
If you tackle this as a DIY repair, you’re out $30–$50 in parts plus an hour of your time. If you hire a professional, expect to pay $200–$350 total (diagnosis, labor, and parts). A full compressor replacement for comparison would run $800–$1,500 in parts and labor combined. In this scenario, repair is the obvious choice. Even if you pay a professional, you’re saving $500–$1,000 compared to replacement.
Verdict: Fix it. Either DIY or call a professional—both options make financial sense. A 5-year-old refrigerator that gets a new capacitor can easily run another 5–10 years.
Scenario 2: Your 10-Year-Old Refrigerator Has a Grinding Compressor
This one is trickier financially. Your compressor is making grinding sounds, which means internal mechanical failure. The compressor can’t be repaired; it has to be replaced. A new compressor costs $900–$1,400 installed. That’s a significant expense for a 10-year-old appliance.
At this point, you need to compare that $900–$1,400 cost against the cost of buying a new refrigerator. A basic, budget-model refrigerator (new or from a scratch-and-dent outlet) costs $400–$800. A mid-range model with better features and efficiency runs $800–$1,200. Yes, a new refrigerator is more expensive than a compressor replacement, but not by much. And here’s what matters: a new refrigerator comes with a 1–3 year warranty on parts and labor. A replacement compressor typically has a 5-year warranty, but you’re still responsible for labor if something else breaks. Plus, your 10-year-old refrigerator is using significantly more electricity than a modern unit—an old inefficient refrigerator can cost you $150–$200 extra per year in electricity compared to a new ENERGY STAR model.
Do the math: $1,000 for a compressor replacement versus $900 for a new budget refrigerator, plus $150–$200 per year in energy savings with the newer model. Over five years, that’s $900 (new fridge) + lower energy costs versus $1,000 (compressor) + higher energy costs. Replacement becomes financially competitive.
Verdict: If the compressor is your only problem, a replacement makes technical sense. But compare the total cost (compressor + increased energy use over its remaining life) against the cost of a new unit (with warranty and energy savings). Many people find replacement more sensible at the 10-year mark.
Scenario 3: Your 12-Year-Old Refrigerator Has a Refrigerant Leak and Weak Cooling
This is the most complex scenario because you’re dealing with a sealed system failure. Before you can even decide on repair or replacement, you need professional diagnosis: a system pressure test ($100–$150) to confirm low refrigerant, then leak detection (another $50–$100) to find the leak.
Once you know where the leak is, the cost to fix it varies wildly. A leak in a braze joint that requires soldering might cost $200–$400 in labor (parts are cheap). A leak in a compressor shaft seal or gasket requires compressor replacement, which means $1,200–$1,800 total. A leak in an expansion valve or copper line means replacing that component, plus system evacuation and recharge, which runs $400–$700 total.
In the worst case (sealed system leak requiring compressor replacement), you’re looking at $1,200–$1,800. In that same range, you can buy a new mid-range refrigerator ($800–$1,500) with warranty, better features, and lower energy consumption. A 12-year-old refrigerator that’s developed a sealed system leak has likely reached the end of its useful life. Another failure could happen within a year or two.
Verdict: Get a professional diagnosis to understand the exact problem. If it requires a $700–$800 repair, that might be worthwhile for another 2–3 years of service. If it requires $1,200+ for a compressor replacement, you’re financially better off replacing the entire unit with a new, efficient refrigerator. The energy savings alone ($100–$200/year) pay for the new appliance within 5–8 years, and you get a warranty instead of crossing your fingers and hoping nothing else breaks.
Extend Compressor Life: Preventive Maintenance
A compressor that receives proper care can last 15–20 years. One that’s neglected might fail in 5–7 years. The difference isn’t complicated repairs or expensive parts—it’s simple attention to detail. You’re doing five basic maintenance tasks that take minimal time and cost nothing to almost nothing. These habits add years to your compressor’s life and prevent sudden failures that cost thousands to fix.
Monthly: Check Your Door Seal
Your door seal is the first line of defense against warm air leaking into your refrigerator. Every time the seal fails or gaps, your compressor has to work harder to maintain temperature. Do a simple test: close the refrigerator door on a dollar bill with the bill hanging out slightly. Try to pull the bill out. If it slides out easily, your door gasket is loose or deteriorating and needs replacement. A new gasket costs $50–$150 and takes 15 minutes to install (usually just peel-off adhesive or a few screws). This single maintenance item prevents your compressor from overheating and running excessively. It also pays for itself within months in reduced energy consumption.
Monthly: Listen to Compressor Cycles
Get to know your refrigerator’s normal rhythm. During typical operation, you should hear the compressor hum for about 15–20 minutes, then stay silent for 10–15 minutes while the cold air circulates. This cycle repeats throughout the day. If your compressor is running constantly—humming almost nonstop with barely a break—it’s working too hard. This might indicate low refrigerant, a clogged condenser, weak cooling, or a weak compressor nearing the end of its life. If it’s not running at all, that’s obviously a problem. Notice changes in these cycles and investigate them. Early detection prevents catastrophic failure.
Quarterly: Clean the Condenser Coils
Once every three months, pull your refrigerator away from the wall and clean the condenser coils. This takes 20 minutes and costs nothing except a soft brush and vacuum. Dust reduces the compressor’s cooling efficiency by 15–30%, which means it has to work harder and runs hotter. Quarterly cleaning keeps the system operating at peak efficiency and extends compressor life significantly.
Quarterly: Verify Temperature Settings
Your refrigerator compartment should stay at 35–38°F, and your freezer at 0°F. If it’s running colder than needed (say, 32°F in the fridge), you’re forcing the compressor to work harder than necessary. If it’s running warmer than needed (40°F or higher), food safety becomes a concern, but your compressor isn’t working hard enough to matter. Check the temperature with a simple thermometer. If settings are off, adjust the thermostat dial. This takes 5 minutes and keeps your compressor operating in its comfort zone.
Quarterly: Ensure Proper Ventilation
Don’t block your refrigerator’s air vents with large containers, food, or clutter. These vents circulate cold air through the fridge and freezer. Blocked vents create hot spots where the thermostat thinks the fridge is cold enough, so it signals the compressor to stop—but other areas are actually warm, causing food spoilage. The thermostat cycles constantly as it tries to regulate temperature across blocked vents, stressing the compressor. Keep vents clear and allow proper air circulation inside.
Annually: Vacuum Behind the Refrigerator
Once a year, pull your refrigerator away from the wall, vacuum the floor underneath, and use a brush to remove accumulated pet hair and dust around the condenser. You’d be surprised how much debris accumulates in a year. This is part of quarterly coil cleaning but deserves special mention because many people forget about the area directly under the unit.
Annually: Inspect the Condenser Fan
At the same time you vacuum, look at the condenser fan (a small fan blade near the compressor or condenser coils). It should spin freely when you rotate it by hand (with the fridge unplugged). If it’s stuck or damaged, it won’t move air through the condenser, and your compressor will overheat. If it’s stuck from debris, clean it. If it’s broken, replace it (typically a $50–$100 part and 30 minutes of work, or $150–$250 if a professional does it).
Annually: Listen for Unusual Sounds
During your annual maintenance, pay attention to any new sounds: grinding, knocking, hissing, or buzzing that wasn’t there before. Grinding indicates compressor bearing damage. Knocking indicates a mechanical problem. Hissing might indicate a refrigerant leak. Buzzing could indicate electrical issues or a struggling fan. Catching these sounds early means you can schedule professional diagnosis before the system completely fails.
Common Mistakes That Make Compressor Problems Worse
People often make things worse by taking action based on incomplete information or misguided DIY intuition. Here are the five most common mistakes and how to avoid them.
Mistake #1: Ignoring a Continuously Clicking Compressor
When your compressor is clicking every few minutes, it’s tempting to think “it’s still trying, so it’s not dead yet, I’ll give it a few more days.” Don’t. Each failed start attempt stresses the motor’s winding insulation. After dozens of clicks per hour over several days, the insulation begins to break down. The more you let it click, the higher the odds that the overload protector will get stuck in the “off” position permanently, or the motor itself will suffer permanent damage.
The solution is immediate diagnosis. Stop using the refrigerator and figure out what’s wrong within 24 hours. If it’s a capacitor (often the cause), fix it immediately. If it’s something you can’t diagnose, call a professional. Every day you let a clicking compressor run undiagnosed is a day you’re risking permanent motor failure.
Mistake #2: Adding Refrigerant Because “More Cold Is Better”
This is a dangerous assumption. Refrigerant charge must be precise. Overcharging a system—putting in too much refrigerant—forces the compressor to work harder, increases pressure, and causes the motor to overheat. The winding insulation breaks down faster. The motor fails sooner. Simply adding refrigerant without measuring system pressure first is guessing, and guessing wrong can destroy the compressor.
The fix is to have a professional measure the system pressure and add only the exact charge the system needs. A one-pound overcharge might not seem like much, but it can reduce compressor lifespan significantly.
Mistake #3: Running the Compressor with a Dirty Condenser
You know the condenser is clogged with dust, but your refrigerator is still cooling (slowly), so you think you can live with it for a few more weeks until you get around to cleaning. Meanwhile, the compressor is working 30–40% harder than normal because heat isn’t dissipating properly. It’s running hotter, the overload protector is constantly near its thermal limit, and the motor is aging rapidly.
Those “few more weeks” might actually be the difference between a compressor that lasts another 5 years and one that fails in 6 months. Clean those coils. It takes 20 minutes, costs nothing, and extends your compressor’s life significantly.
Mistake #4: Using Leak Sealant Products to Patch Small Refrigerant Leaks
You’ve noticed your cooling is getting weak, and someone suggests trying one of those “refrigerant sealant” products that you add to the system to plug small leaks. These products do seal some leaks—but they leave residue inside the system. That residue clogs the expansion valve, restricts refrigerant flow, and creates new problems downstream. You might fix a small leak, but you’ve caused bigger problems elsewhere. Now your compressor is starved of cool refrigerant and working harder to achieve less cooling.
The right fix is to find and repair the leak properly—usually by replacing a component or having a technician solder a damaged line. Only after the leak is fixed should you recharge the system.
Mistake #5: Forgetting to Discharge a Capacitor Before Touching It
Capacitors store electrical energy independently of whether your refrigerator is plugged in. You unplug the fridge, think you’re safe, and reach down to touch or remove the capacitor. If you contact both terminals simultaneously, the capacitor discharges through your body. It’s not lethal, but it’s painful—similar to touching both sides of a 9-volt battery to your tongue, only much worse. You can burn your skin, damage nerves, or accidentally jerk your hand and hit something sharp.
Before touching any capacitor, use an insulated screwdriver to short both terminals together. You’ll hear a small pop—that’s the capacitor discharging safely. Now it’s safe to touch and work with. This 5-second precaution prevents injury.
FAQ: Your Compressor Questions Answered
How much does a refrigerator compressor replacement cost?
Compressor replacement involves two costs that must be considered together. The OEM (original equipment manufacturer) compressor itself typically costs $400–$1,000, though this varies significantly by brand. Whirlpool, LG, and Samsung compressors command premium prices, while off-brand alternatives might cost less. Professional labor adds another $300–$800, depending on how accessible your unit is and how experienced the technician is. Budget $700–$1,800 total. A few additional factors affect final cost: if your refrigerator is still under manufacturer warranty, the replacement might be covered entirely. If you’re buying from a scratch-and-dent retailer, they often offer installation at a discount. Shop around—labor costs can vary by $200–$300 between technicians.
Can I buy a used compressor to save money?
Buying used might seem like a $100–$250 savings, but the risks far outweigh that discount. A used compressor has unknown history—it could have internal wear, insufficient oil, or contamination from whatever caused the previous system to fail. If you install a used compressor in your refrigerator and it fails after three weeks of operation, you’ve paid for the compressor twice: once for the used unit and once for another repair. New compressors come with 5-year manufacturer warranties; used ones have no warranty at all. If something goes wrong, you’re paying the entire replacement cost again. The math simply doesn’t work in your favor.
Why is my compressor running constantly without cooling?
Constant running while cooling weakens tells you the compressor is working hard but not achieving its goal. The cause could be any of several issues: low refrigerant charge (you’re compressing air, not refrigerant), a dirty condenser (heat isn’t dissipating), a faulty thermostat (the fridge thinks it’s colder than it actually is), or a genuinely weakening compressor nearing the end of its life. Each cause requires different diagnostic steps. Low refrigerant needs pressure testing. A dirty condenser needs cleaning. A faulty thermostat needs replacement. A weak compressor can only be confirmed with professional pressure analysis. Don’t guess—have a technician with a manifold gauge set diagnose the problem properly.
What’s that brown or black oil leaking from my compressor?
That’s compressor motor oil, and it’s an emergency. Your compressor is designed with a sealed cavity containing specialized oil that cools and lubricates the motor. If that oil is leaking out, you have a serious problem: either the housing is cracked or the gasket has failed. Brown or black oil color indicates the oil has been overheated significantly—another sign of stress. Continuing to run the compressor will deplete its oil supply, leading to oil starvation, motor friction, and complete failure. Stop using the refrigerator and schedule professional service immediately. In almost all cases, replacement is the only solution.
Is it normal for a compressor to be warm to the touch?
Yes, normal operation produces heat. You should be able to hold your hand on the compressor housing for 5 seconds without discomfort—it will feel like warm bathwater. If you can’t hold your hand there for more than 1–2 seconds because it’s too hot, the compressor is overheating. Common causes include a dirty condenser (heat can’t escape), an overcharged refrigerant system (too much pressure), the wrong type of refrigerant (incompatible), or a weakening motor struggling to compress. Start by cleaning the condenser coils—this solves 50% of overheating issues. If the compressor remains too hot after cleaning, schedule professional diagnosis.
Can I repair a compressor myself if I’m handy?
Some compressor problems are genuinely DIY-friendly, and others absolutely aren’t. You can safely replace a start capacitor, tighten loose electrical connections, clean condenser coils, and reset an overload protector. These repairs involve no refrigerant, no sealed system work, and minimal electrical risk (as long as you discharge the capacitor first). Where you must draw the line is at any work involving the sealed system itself: recovering refrigerant, replacing the compressor, detecting or repairing leaks, or soldering copper lines. This work requires EPA Section 608 certification by federal law. It also requires specialized equipment that costs thousands of dollars. Attempting sealed system work without certification exposes you to fines up to $25,000, system contamination, and possible injury.
How do I know if my compressor is actually dead, or if it’s just the start relay?
A multimeter helps, but only if you know how to use it. If you have one, you can test whether the start capacitor and relay have electrical continuity. No continuity = a dead component worth replacing ($20–$50). If you test both and find continuity in both devices, but the compressor still won’t start, the problem is inside the compressor’s sealed motor—the internal windings are likely burned out. At that point, you’ve eliminated the cheap fixes and replacement is your only option. If you’re uncomfortable using a multimeter, let a professional do the testing. A $100–$150 diagnostic fee tells you definitively whether it’s a $30 fix or a $1,200 replacement.
Should I replace the compressor, condenser, and evaporator all at once?
Only replace what’s actually broken. The temptation is to replace the entire sealed system “while we’re in there,” but that adds unnecessary cost. If only the compressor has failed and your condenser and evaporator are functioning normally, replace just the compressor. However, if your refrigerator is over 12 years old and the compressor has failed, consider this: replacing the compressor might cost $1,200–$1,800, but a new refrigerator might cost only $900–$1,500. A new unit comes with a full warranty, better energy efficiency (saving $100–$200/year), and modern features. Over five years, those energy savings pay for much of the appliance cost. Age plays a role here—if your fridge is old and the compressor failed, the system has probably been stressed for years. Other components might fail soon. Replacement of the entire unit is often the smarter long-term choice.